 How to Jailbreak Your 2.0.x 3G iPhone (Windows) [WinPwn 2.5]
Friday, 29th August 2008, 03:08 pm
Instructions on how to jailbreak your 2.0.x 3G iPhone using WinPwn 2.5 for Windows. [Updated for 2.0.2]
These are instructions on how to jailbreak your 2.0.x 3G iPhone using WinPwn 2.5 for Windows. They have been updated for iPhone firmware 2.0.2.
To follow this tutorial you will need to have iTunes 7.7 installed (make sure to reboot). Also, you may need to download and install .Net Framework if you are on Windows XP. Finally, make sure you completely uninstall any previous version of WinPwn. Thanks to cmw for all his hard work on this!
Step One
Create a folder on your desktop called Pwnage. In it place Winpwn 2.5(mirror) and the latest 2.0 firmware.
2.0.2 (3G): iPhone1,2_2.0.2_5C1_Restore.ipsw 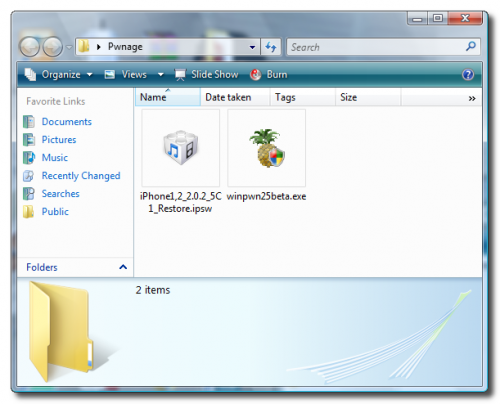
Step Two
Install WinPwn by double clicking the downloaded executable. Once WinPwn has been installed it will put a shortcut icon on your desktop. Double click to launch the application. ![7489[1]](http://iphone.pocitac.com/images/JakJailbreaknout2.0.x3GiPhoneWindows_D462/74891.png)
Step Three
Once WinPwn has opened click to select the iPhone 3G. 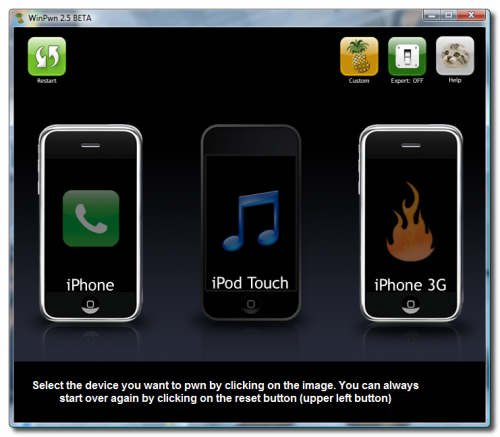
Step Four
You will then be asked to select the firmware you would like to use. Do this then click the green right arrow at the bottom right of the window. 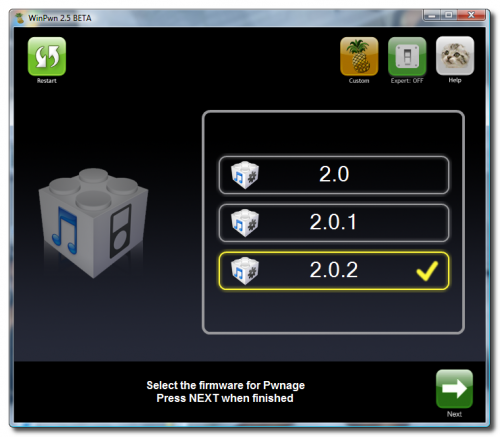
Step Five
WinPwn will then ask if you are using an official carrier. Most likely you will need to click the green thumbs up button. 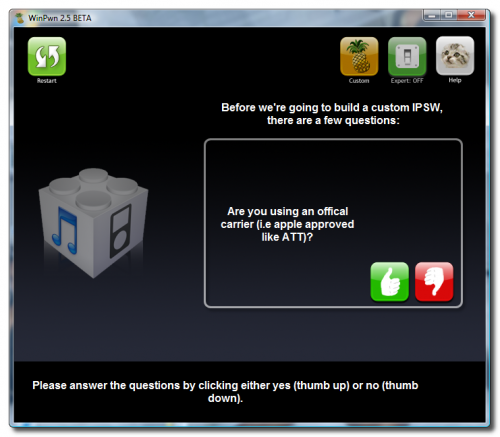
Step Six
WinPwn will then ask if you would like to use custom boot/recovery images. Click the green thumbs up button if you would like to. 
Step Seven
You will now be able to select your custom images. Click the iPhone on the left to select your boot logo. Click the iPhone on the right to select your recovery logo. 
Remember the rules for them: RGB or Grayscale format with Alpha channel and dimension bellow 320×480. If you would like to use the iClarified ones they can be found here: Boot Logo, Recovery Logo
Click the green arrow button to continue. 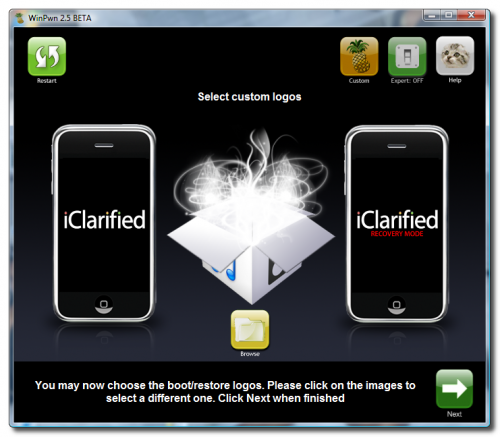
Step Eight
WinPwn will now search for your ipsw firmware file. If it cannot find it you will be asked to search manually. Click the green thumbs up button then navigate to the Pwnage folder on your desktop and select the ipsw you downloaded in Step One. ![7498[1]](http://iphone.pocitac.com/images/JakJailbreaknout2.0.x3GiPhoneWindows_D462/74981.png)
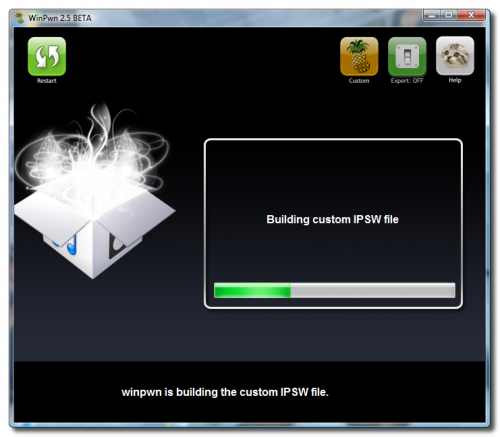
Step Nine
WinPwn will now build your custom ipsw. 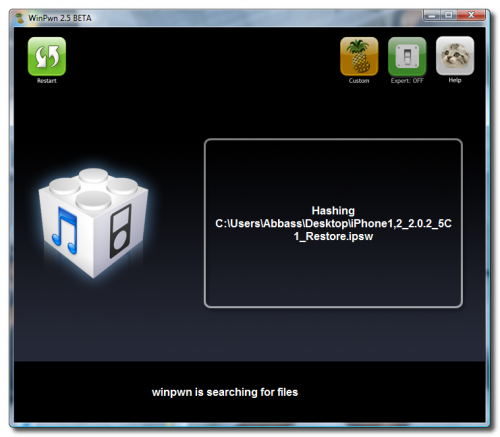
Step Ten
Once your custom ipsw has been built WinPwn will ask you if you want to see instructions on putting your iPhone into DFU Mode. Click the green thumbs up button for yes or the red thumbs down button for no. ![7501[1]](http://iphone.pocitac.com/images/JakJailbreaknout2.0.x3GiPhoneWindows_D462/75011.png)
Step Eleven
WinPwn will then prompt you to connect your iPhone via USB and make sure its turned off. Do this then click the green thumbs up button. ![7502[1]](http://iphone.pocitac.com/images/JakJailbreaknout2.0.x3GiPhoneWindows_D462/75021.png)
Step Twelve
WinPwn will then say its ready to start Pwnage. Click the green OK button. ![7503[1]](http://iphone.pocitac.com/images/JakJailbreaknout2.0.x3GiPhoneWindows_D462/75031.png)
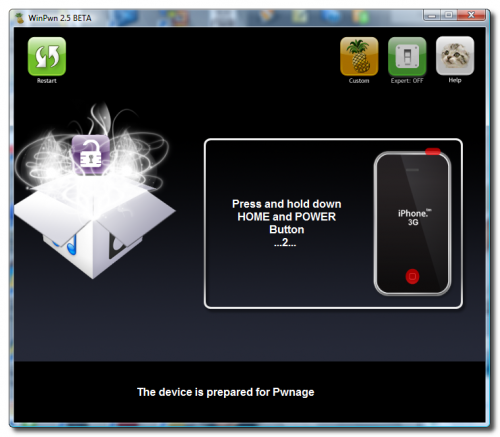
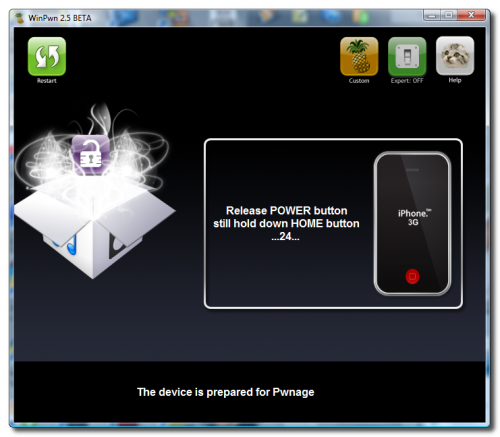
Step Thirteen
Be ready to follow directions now. It will ask you to hold the home button and the power button for 10 seconds. Then, you will have to release the power button and hold the home button for 10 seconds to enter DFU. 

Step Fourteen
Once you iPhone is in DFU mode WinPwn will begin the pwnage process. 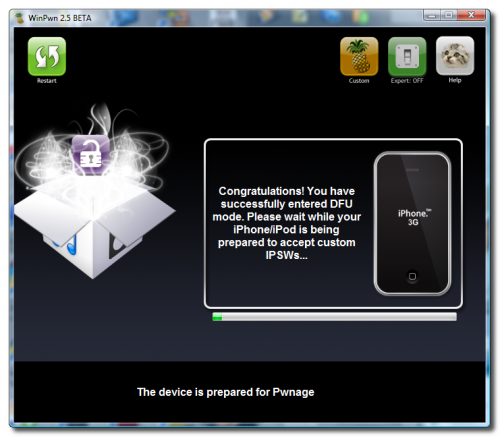
You will be informed when pwnage is complete. 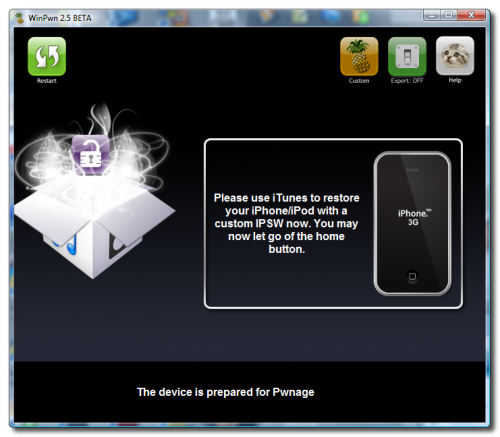
Notice that your iPhone will display a "Ready to restore Custom IPSW" message. ![7532[1]](http://iphone.pocitac.com/images/JakJailbreaknout2.0.x3GiPhoneWindows_D462/75321.png)
Step Fifteen
iTunes will now prompt you that you are in recovery mode. ![7517[1]](http://iphone.pocitac.com/images/JakJailbreaknout2.0.x3GiPhoneWindows_D462/75171.png)
Hold down Shift and click the Restore button in iTunes. 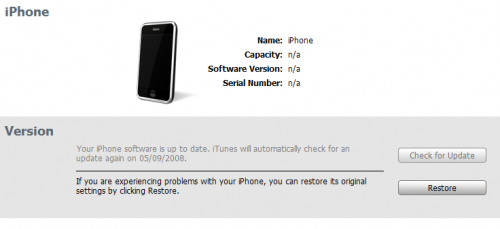
A popup window will appear asking you to select your firmware. Select the Custom firmware file we created using WinPwn then click the Open button. NOTE**: WinPwn placed the Custom firmware file in the "My Documents" folder. ![7519[1]](http://iphone.pocitac.com/images/JakJailbreaknout2.0.x3GiPhoneWindows_D462/75191.png)
Your iPhone will now be restored to the jailbroken 2.0.x firmware of your choice!
